| |||
|
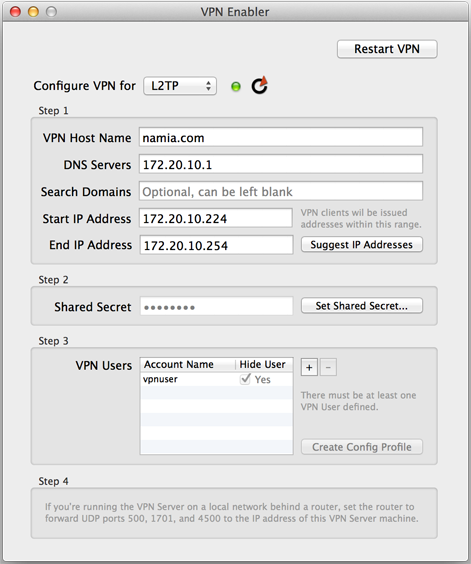
VPN Enabler for High Sierra There is a VPN Server built into every plain Mac OS X machine, only it's not activated unless you know how to type in a lot of geeky commands and dive into a lot of configuration files. What VPN Enabler does is to do all that stuff for you in just three (OK, maybe four) steps and just one click. VPN Enabler now supports both L2TP and PPTP protocols. Setting up the VPN Server This is what VPN Enabler looks like. Step 1. You only need to provide the Host Name for your VPN Server. Of course, this host name or domain name must be accessible from the Internet. Then, look for the “Suggest IP Addresses” button. If you’re running VPN Enabler on the single machine on the local network, behind the router, that has all the Internet services loaded on it (e.g., web, mail & DNS server, all on one machine), which is quite a reasonable assumption for the user base that is running all my “enabler” apps, then when you click on that “Suggest IP Addresses” button, it’ll try to provide you with reasonable values that you can use. These values are provided to an incoming VPN client, on joining the local private network. It'll be assigned an IP address within the range you provided, and then it’s told where to go for DNS services. Basically, the VPN Server acts like a DHCP Server for incoming VPN clients.
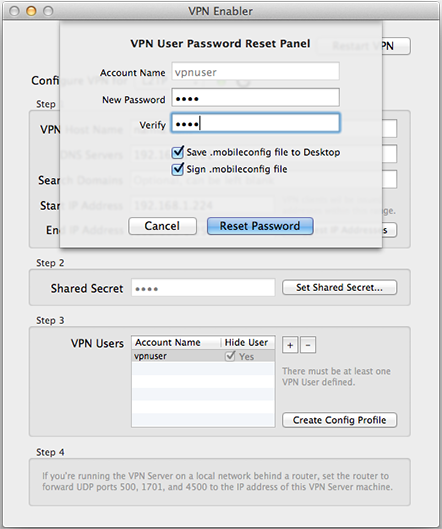
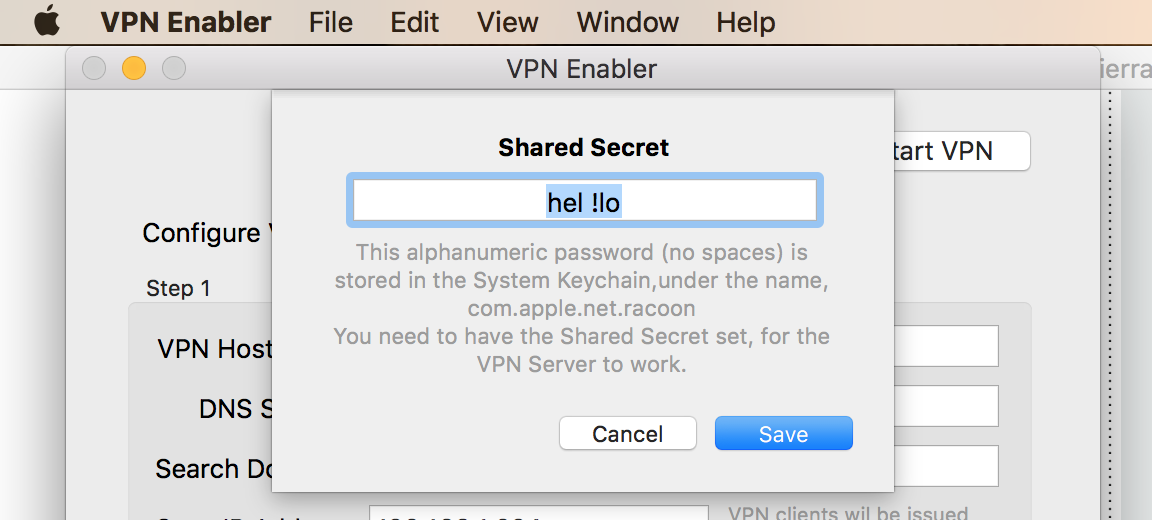
Step 2. Enter a Shared Secret, which is just a word you need to enter into a VPN client, like Network Preferences on a client Mac or the VPN Connection Setup in iOS Preferences for the iPhone or iPad. Step 3. Set up at least one VPN user account on your server machine. Give it a name and a password. Both will also be given to the VPN Client. (Use a name that has not been used and especially not the name of an admin user. The VPN User will be created as a simple non-admin user because you don’t want to be logging on to your VPN as an admin-level person from wherever you are in the world). Step 4. An Important Tech Note : NOTE : I’ve just set up a VPN Server behind a router that didn’t require me to do all the following port forwarding things. So you may get lucky and there’s no Step 4. Usually this is a router that allows you to set a DMZ, an internal IP address that all traffic from external IP addresses get directed to, for internet services. Try this first. If it works, you can stop here for the VPN server. You don’t have to set up port forwarding for VPN ports manually. If you’re not so lucky, this is a bit more technical. If you’re running the VPN Server on a local network behind a router, you need to figure out how to set up the router to forward UDP ports 500, 1701 and 4500 to the local IP address of your VPN Server machine (and also port 1723 if you want to support PPTP). This is not as difficult as it sounds. Your router (which might be bundled with a wifi base station) would have a setup page that you can access using a web browser. Look for the Port Forwarding setup page, which is probably lumped with the Firewall settings. Then use that setup page to create three port forwarding records to associate UDP ports 500, 1701, and 4500 with the local IP address of the Mac that is running your VPN Server. This way, when network traffic comes in from a VPN client, the router will know which machine to route them to for processing. Setting up the VPN Clients 1. The Automated Way From version 1.0.3 onwards, VPN Enabler allows you to save a mobileconfig profile that can be sent (e.g., by email) to the user of both an iOS device or the Mac, and it’ll save the user from having to know all of the following configuration steps for a VPN client. All the user has to do is to tap on the .mobileconfig file that he sees (if he’s on iOS) or to double-click on it (if he’s on a Mac), and follow through with the automated installation steps. He’ll have everything set up for him and all he has to do is to make the VPN connection (in the Settings app, on iOS) or via Network Preferences (on the Mac). VPN Enabler gives the administrator two ways to generate a .mobileconfig file. One way generates a profile without the VPN user password, and this is available from the main VPN Enabler window. The other way is more convenient, because it includes the password, allowing the user to just focus on making the VPN connection. This other way is available when the user is either creating a new VPN user account or resetting the user account password, and it’s shown below :
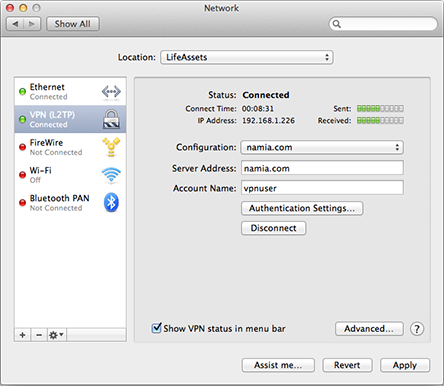
On top of saving the profile, the administrator is also encouraged to sign the profile, if the server VPN Enabler is running on has the SSL cert for the domain installed (in OS X’s OpenSSL folder in /System/Library). 2. Manually Setting up VPN Clients On the Mac client, set up your VPN configuration like this in Network Preferences, by entering the VPN Server’s host name and the VPN user account name :
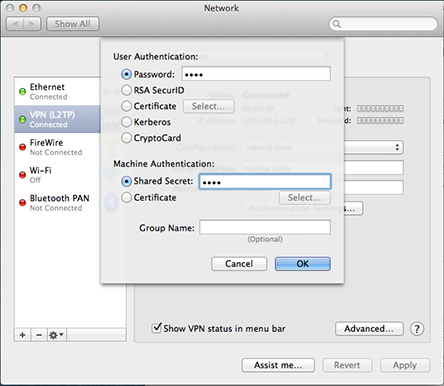
Click the "Authentication Settings" button and enter the VPN User account password and the Shared Secret :
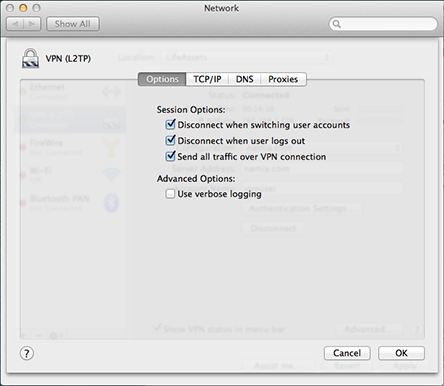
And click the Advanced… button to set the “Send all traffic over VPN connection” option:
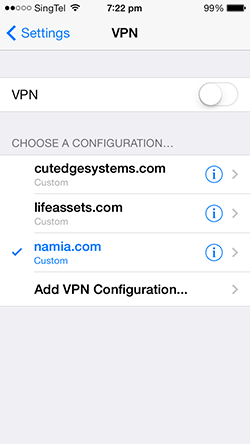
For iOS clients, look for Settings > General > VPN. Add a VPN Configuration:
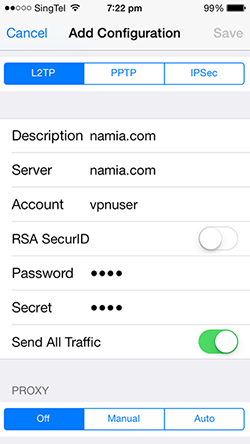
and, in the Add Configuration panel, do this:
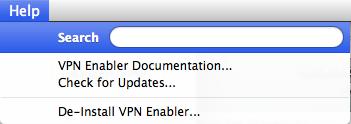
And that’s all there is to it. Enjoy! De-Installing VPN Enabler You can de-install VPN Enabler by using the last menu item in the Help menu. It will shut down the VPN Server, if it is running, and remove all files installed by VPN Enabler (in /usr/local/cutedge/vpn).
5.0 October 2nd 2017. VPN Enabler for High Sierra released. 5.1 January 17th 2018. In version 5.0, only the VPN user called “vpnuser” can authenticate with the server. There was a bug where I hard-coded the user name to vpnuser. This version fixed that bug so you can create any user name for the VPN user. 5.2 Spetember 23rd 2018. Allows Shared Secret to contain spaces and special characters, like this:
|
Download The latest version of VPN Enabler is 5.2 Please check out the Release Log
There is a VPN Enabler for Mojave. |
||