Let’s Encrypt is a movement. It is a non-profit Certificate Authority providing TLS certificates to over 225 million websites. These are first-class, standards-compliant digital certs that can be used for any number of domains (and sub-domains), for free.
So, imagine being able to immediately “issue” these certificates, with just one click, and use them with your websites (using WebMon) or mail servers (using MailServe) — again, with just one click. Now you can.
Introduction
This is the complete Letsencrypt Enabler window, below, showing all its options. There is a new “before and after” Scripts button next to the Renewal Interval popup menu button, both of which only appear if you turn on the Auto-Renewal Job button.
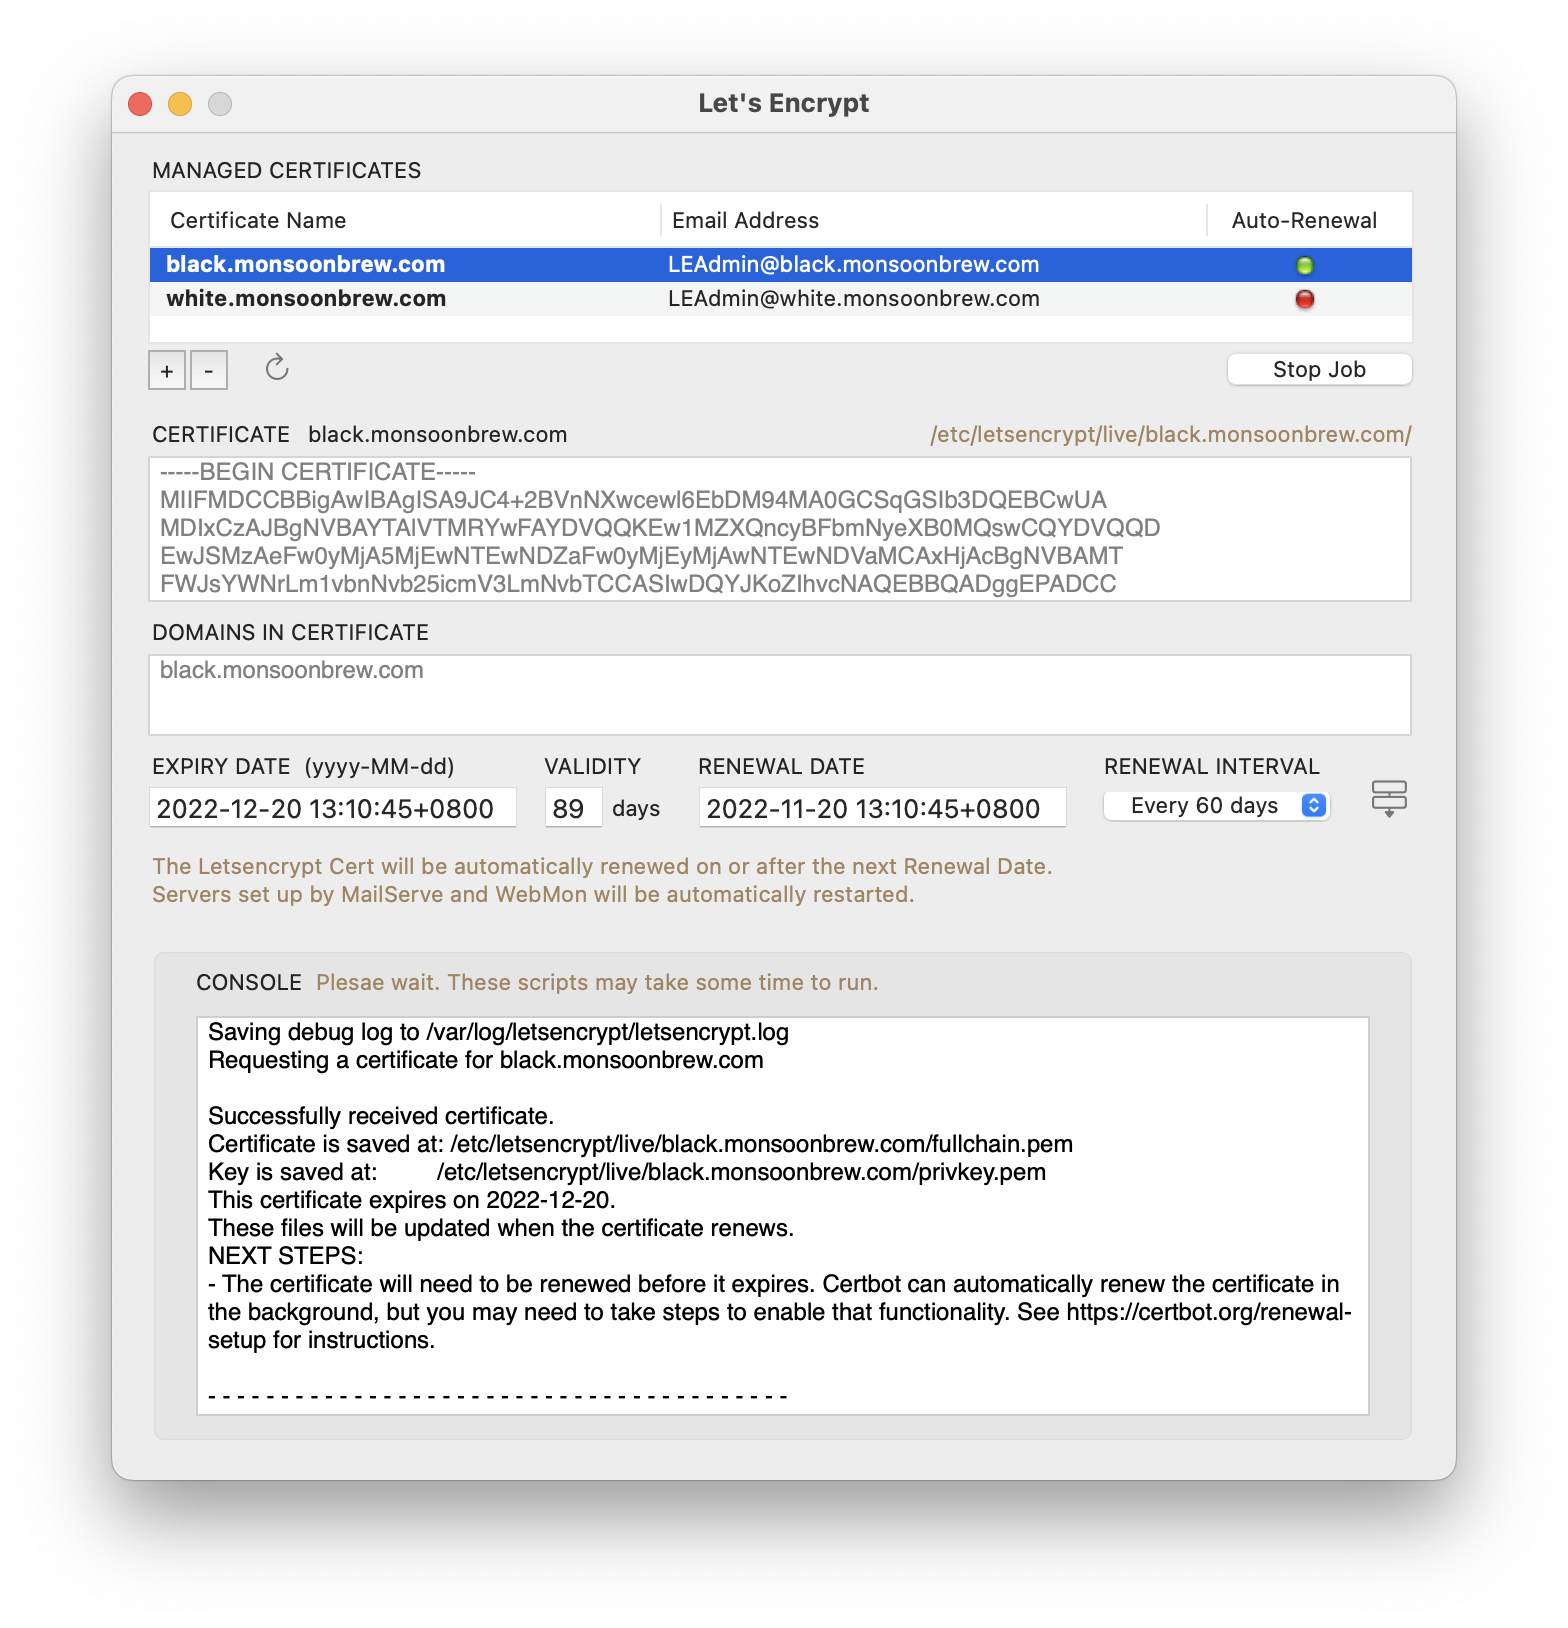
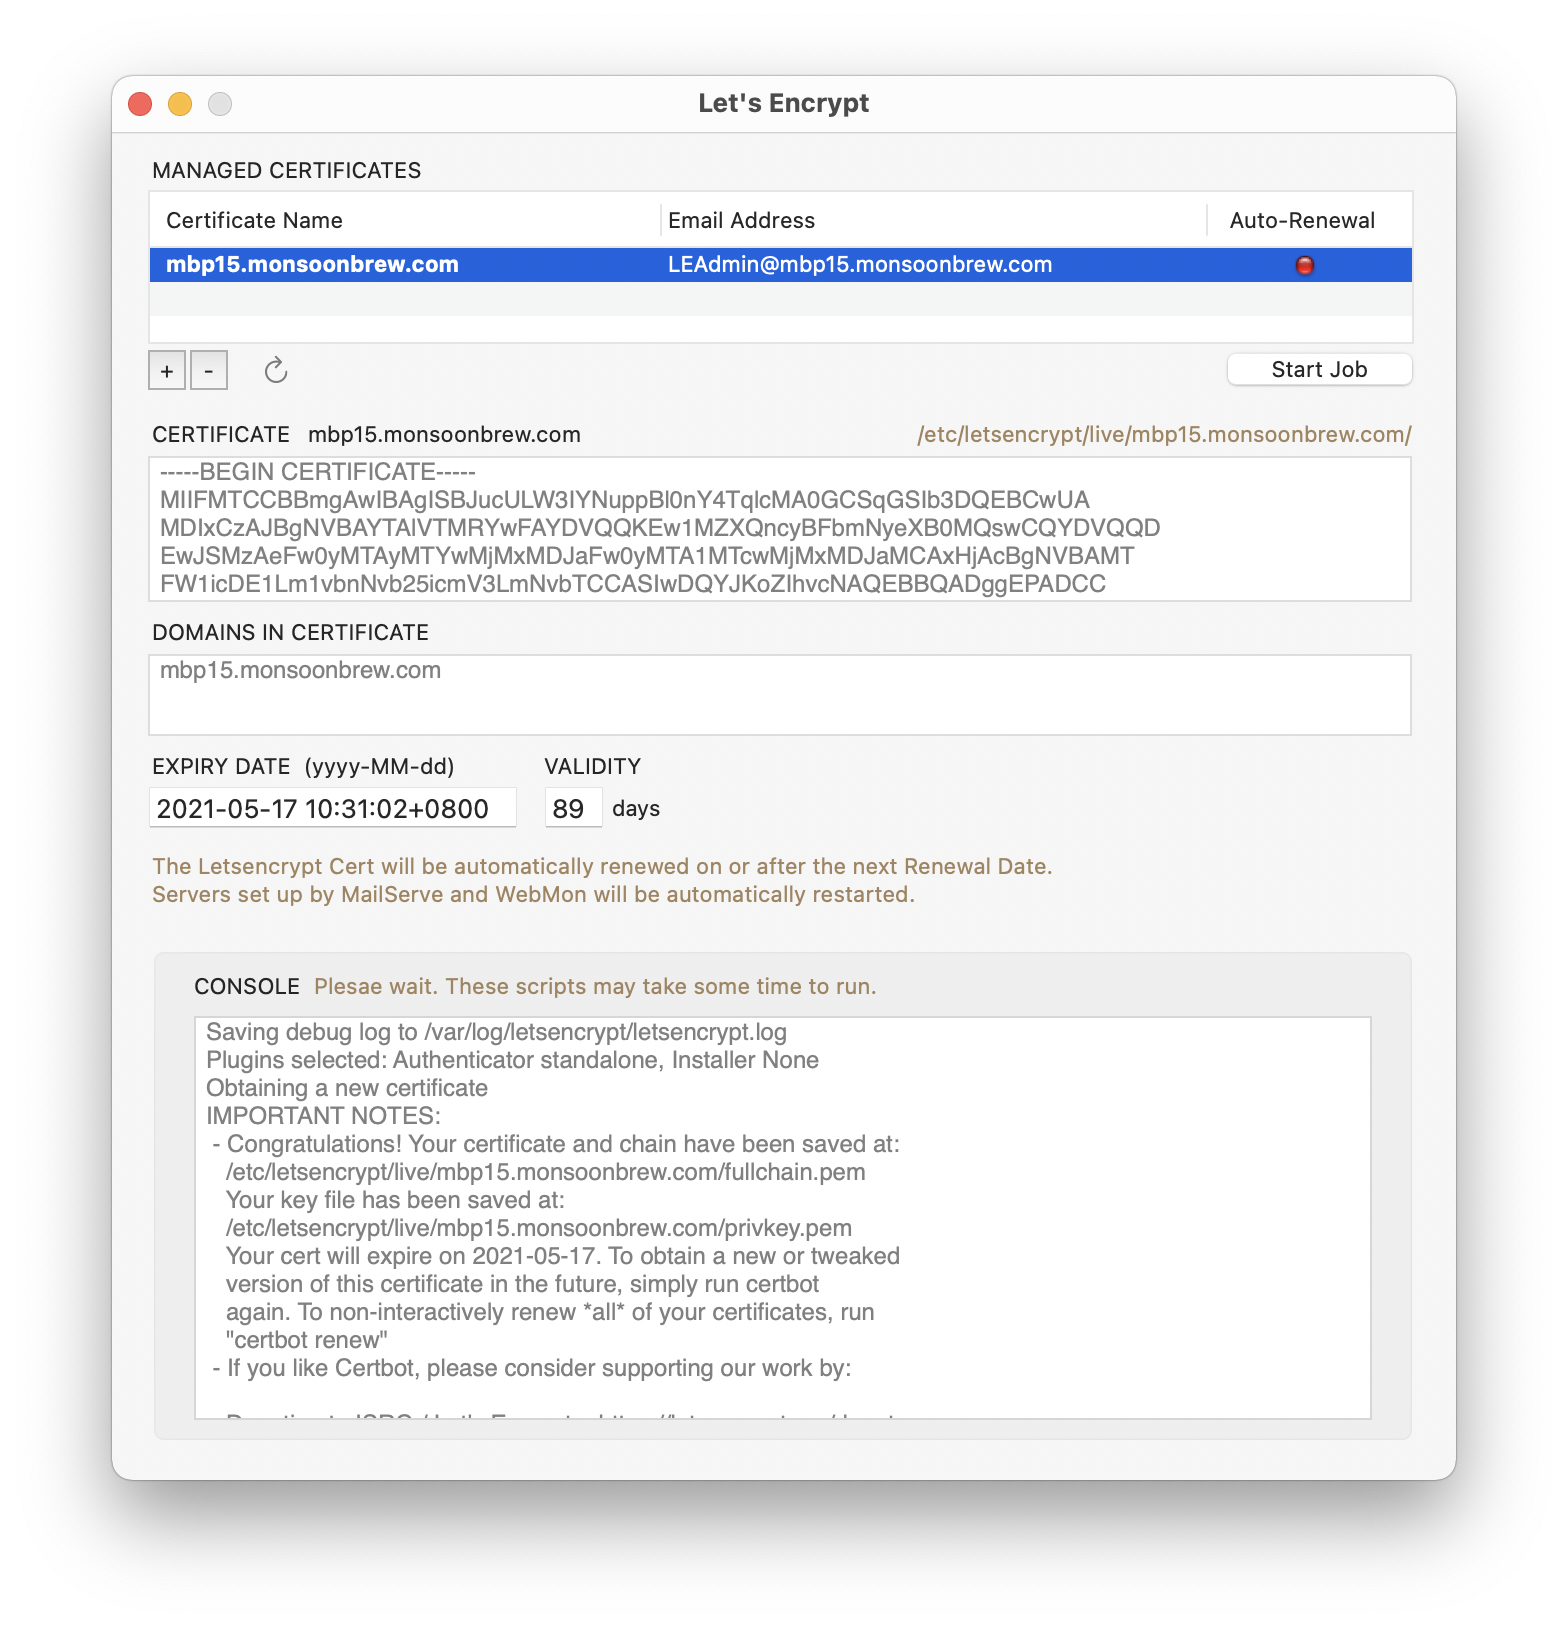
When you start up, you will have no certificates, of course. Letsencrypt Enabler installs all the stuff you need to generate Let’s Encrypt certificates into /opt/homebrew-cutedge. The certifcates that are generated are saved into /etc/letsencrypt/live, where MailServe and WebMon can find them.
Letsencrypt Enabler for Ventura installs a pre-built (ARM or Intel) version of Certbot into the single folder /opt/homebrew-cutedge, which makes it very easy to un-install.
Creating your first certificate
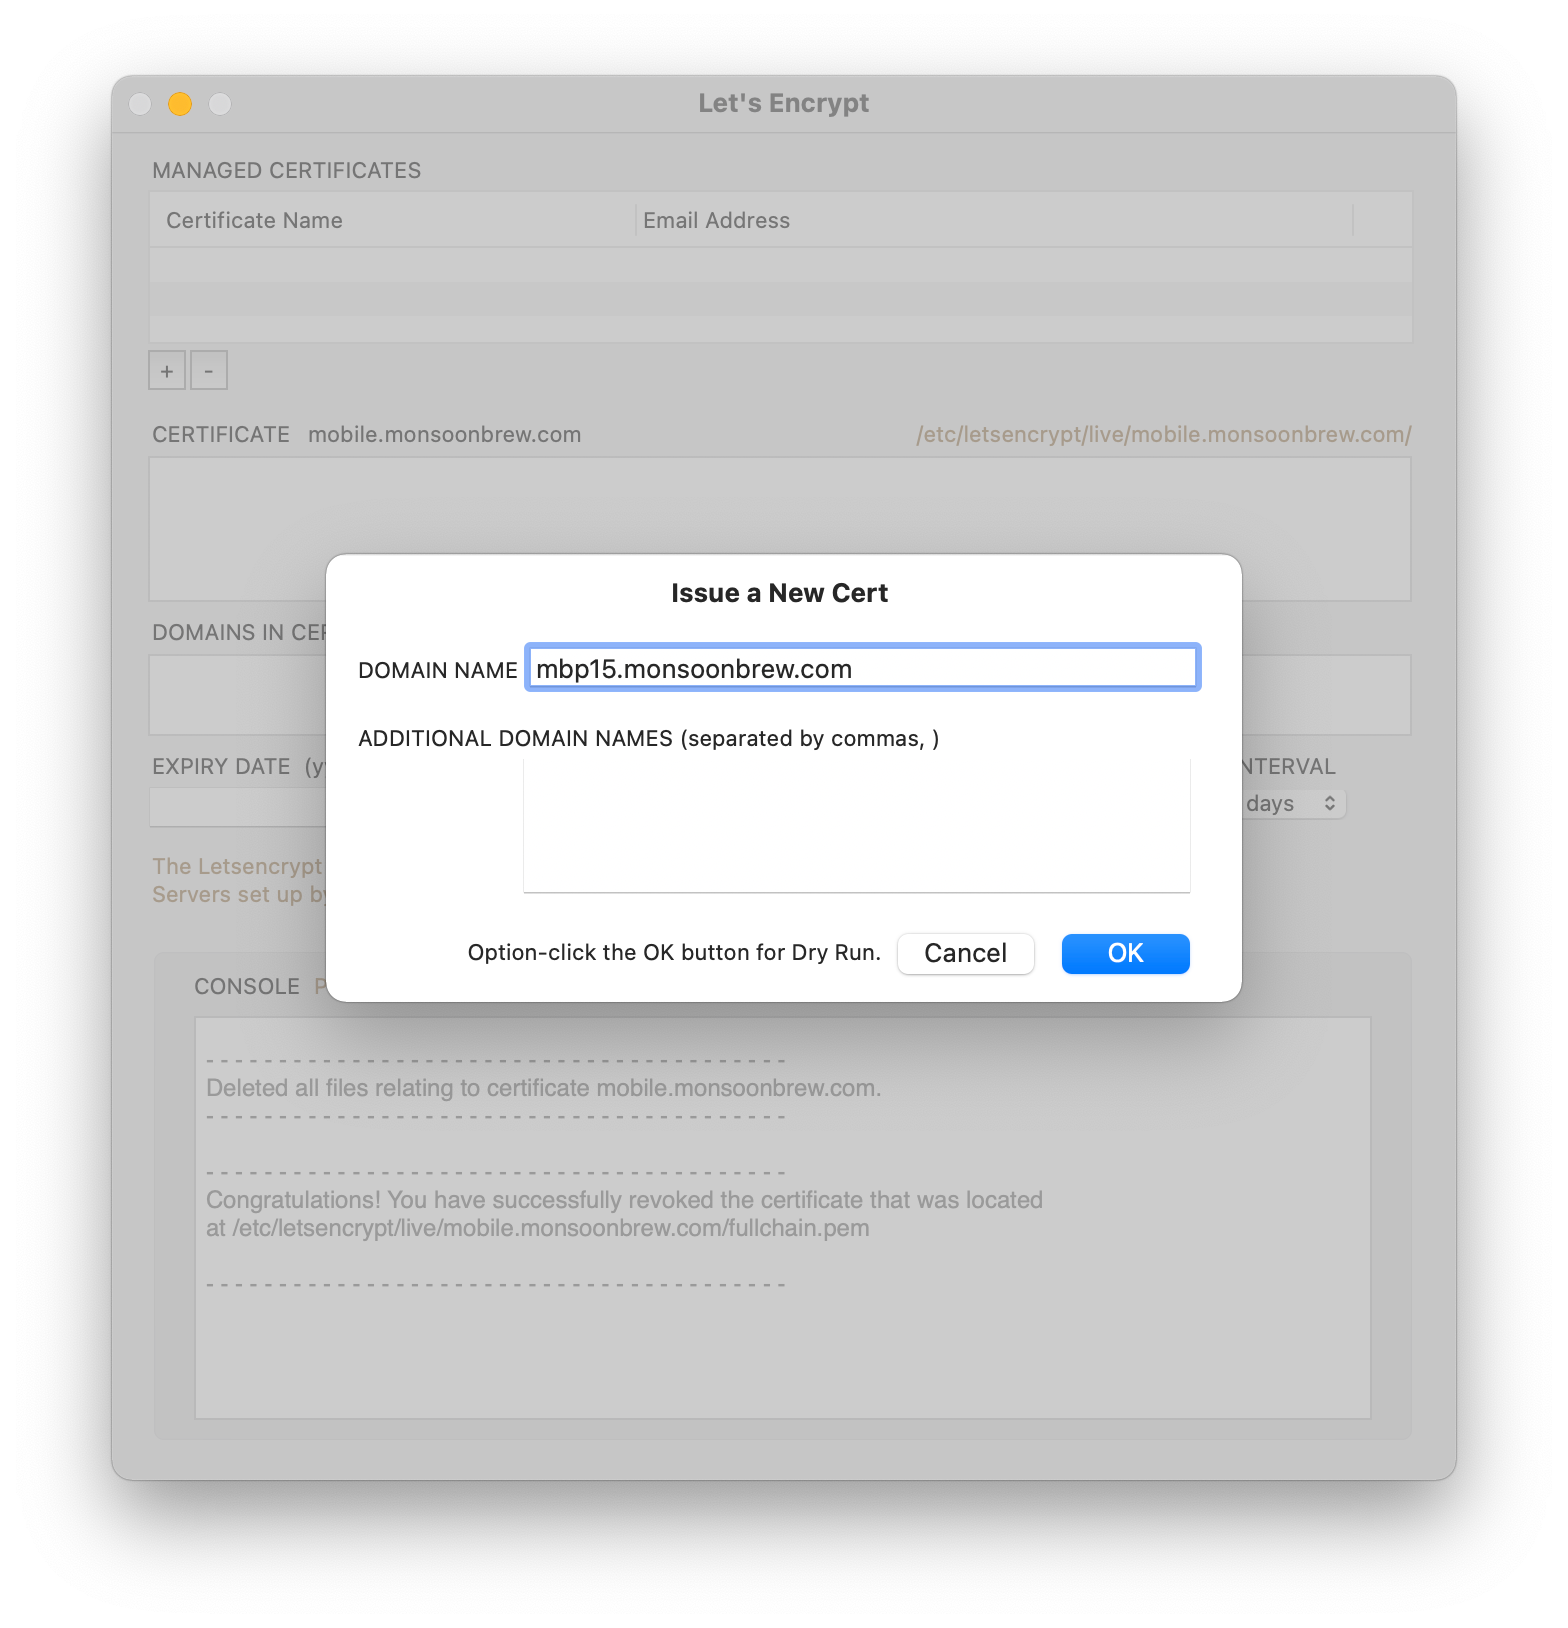
Look for the + button near the top left of the window, and click on it. Enter your domain name. Then click OK. That’s it.
Option-click on the OK button to do a dry-run without actually creating the cert. The Console log will show if the cert could be created or, if not, what the errors are.
You can create any number of certs.
Or, include any number of domains and sub-domains in one cert (use the ADDITIONAL DOMAIN NAMES field).
WebMon and MailServe Note : What this means, in the latter case, is that all the Additional Domains you have in WebMon and MailServe, beside just the primary domain, can now also get the benefit of SSL — so long as all these additional domain names are listed in the ADDITIONAL DOMAIN NAMES field, above, and saved in the cert named after the primary domain. This is something you can’t do or can only do at much added expense, before Letsencrypt.
Once these are created, you can use them with your mail and web servers. Both MailServe and WebMon have a radio button for turning on SSL using Let’s Encrypt certificates. The only requirement being that the primary Domain Name must “line up”, remain consistent, across all three applications.
When you see an error in the Console field while creating a cert
If you can’t create a Let’s Encrypt certificate, you may have a problem with the Domain Name System.
Let’s Encrypt’s Certbot communicates with its parent servers by running a builtin standalone server on port 80. So, if you have a web server running, you need to shut it down temporarily for Certbot to do its job.
Let’s Encrypt’s server will try to communicate with Certbot’s builtin web server, using the domain names you supplied in your cert request. If it can do that, it will accept that as proof that you own those domain names and have the right to control the services on the machine associated with them.
(WebMon user note : Letsencrypt Enabler shuts down the Apache server enabled by WebMon automatically. Then brings it up when it’s done.)
If all these line up, you’ll have the pleasure of seeing your first free, first class, digital cert being created.
Automated Cert Renewals
Previously, before Letsencrypt Enabler, there is a pain to using Let’s Encrypt certificates — they have very short validity periods. Most users renew them at the 60 day mark —manually.
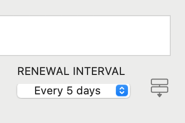
Letsencrypt Enabler makes the renewal process painless. Under the Auto-Renewal column, you can click the Start Job button to start a periodic job that will talk to Let’s Encrypt’s servers at the specifed time intervals. The default renewal interval is 60 days.
You can set the Renewal Interval in Letsencrypt Enabler to custom amounts. Choose a smaller one, say two hours, or one day, to test that the automated cert renewal works. If everything works, set the Interval to a longer value and then quit the app. Just set and forget.
NOTE : but do note that Let’s Encrypt has a hard limit of 5 renewals allowed each week. Don’t cross that or your domain will be temporarily banned from making renewals.
Use the website https://crt.sh to check if your cert has been successfully renewed.
Letsencrypt Enabler’s periodic job will also tell WebMon and MailServe to automatically restart your web and mail servers, respectively, to make use of the renewed certs.
NOTE : If you set a Renewal Interval, it doesn’t mean that the renewal job will run exactly at the time stated in the Renewal Date field. For Renewal Intervals of less than a day, the periodic job is set to run every hour. For Renewal Intervals of a day or more, the periodic job is set to run only twice a day. Each time it runs, it checks to see if the current time is greater than the stated Renewal Date & Time. If it is, it does the renewal job of refreshing the current cert and rebooting the web and mail servers (if they’re set up by my other Enabler apps) to use the new cert.
This process will extend the new cert Expiry Date to the next 90 days and the Renewal Date to the next Renewal Interval. Once you’re sure everything is working correctly, set the Renewal Interval to 60 days and quit the app. The peridoc job will keep on running, until you revoke and delete the cert or un-install Letsencrypt Enabler.
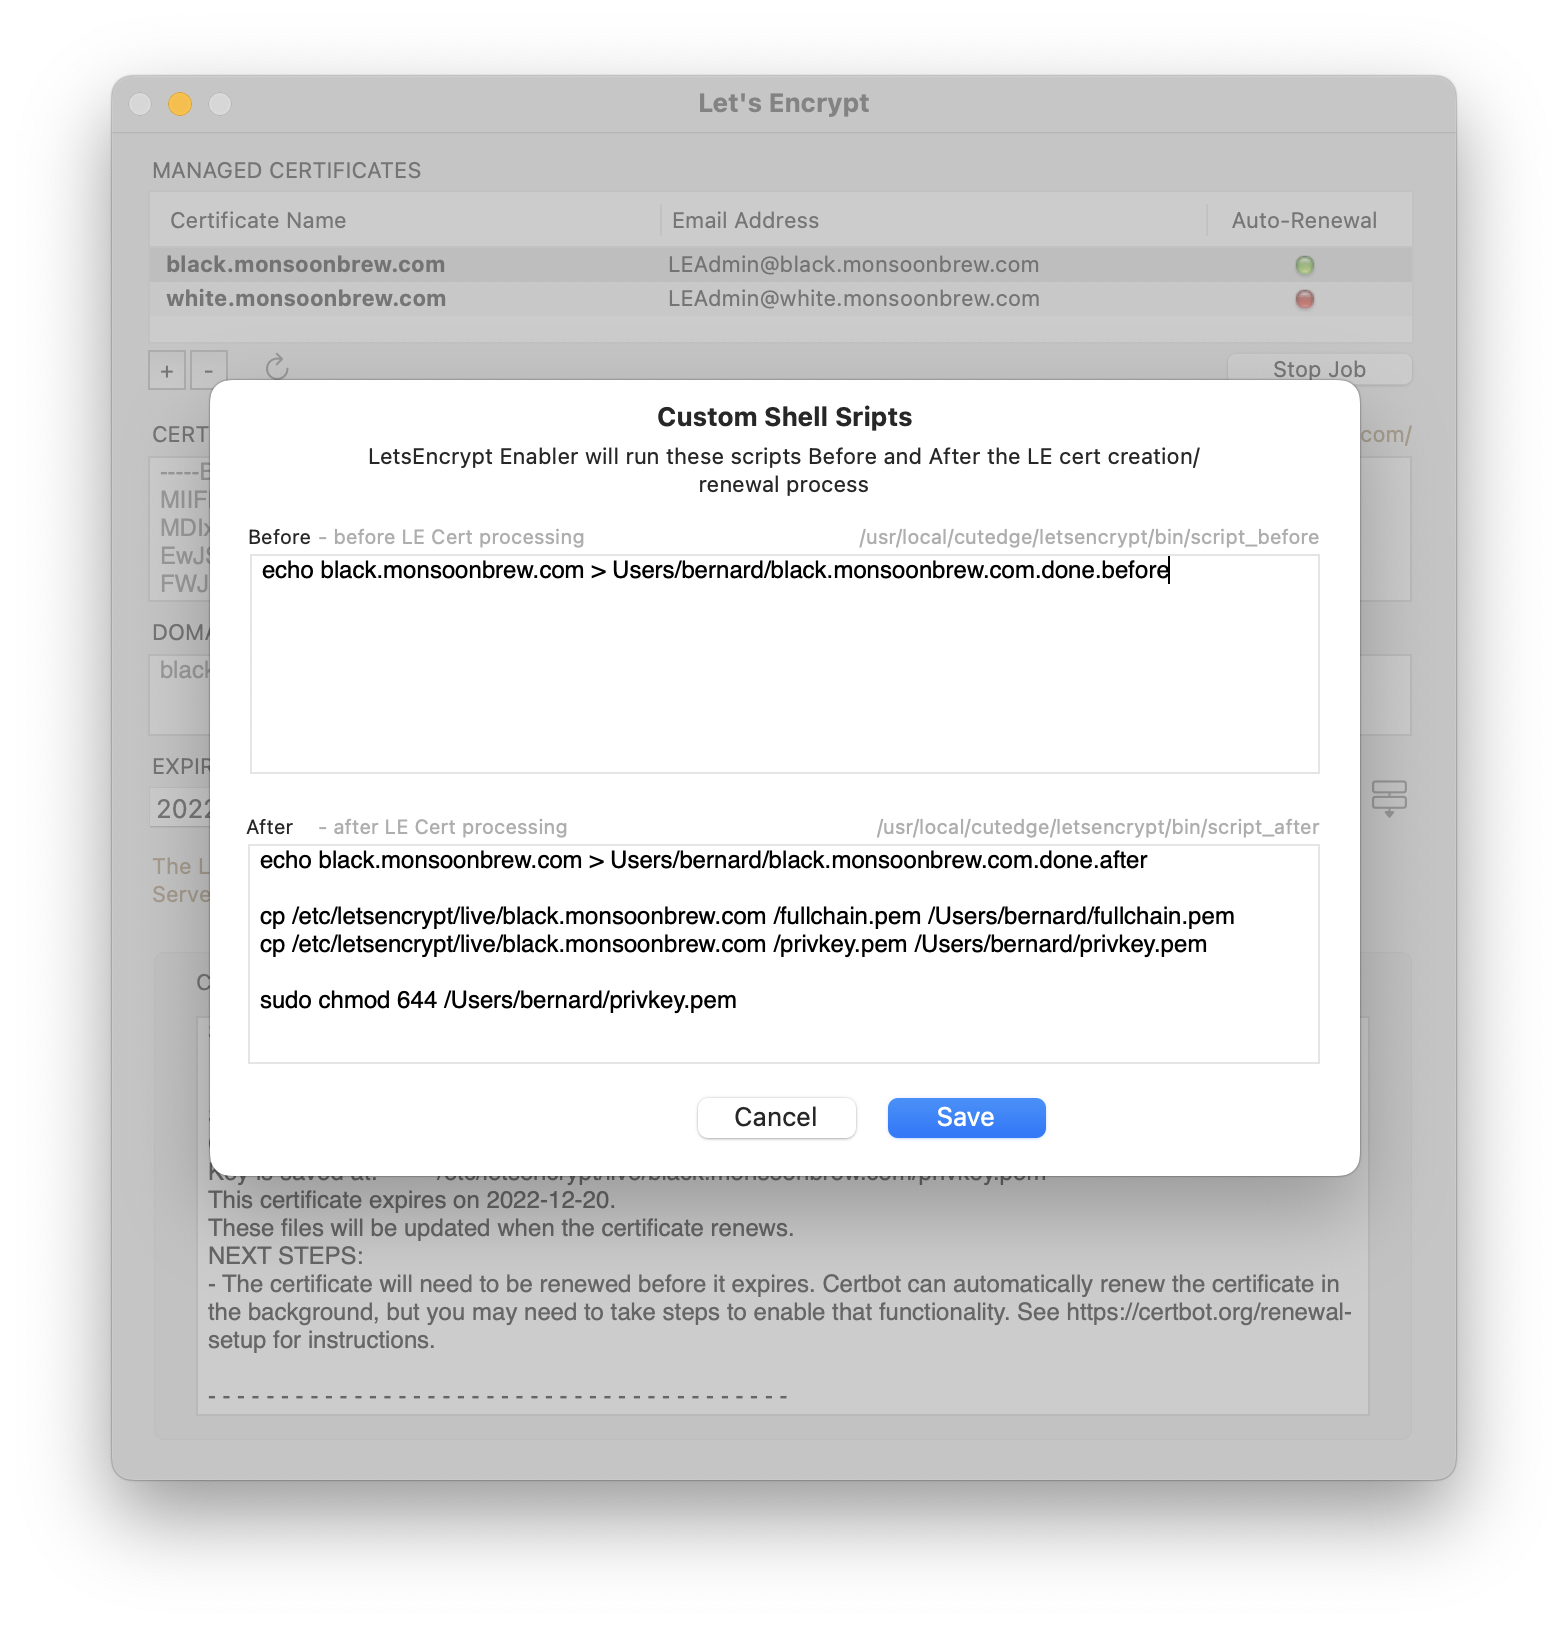
Scripts Button
To the right of the Renewal Interval, there is a Scripts button. This button will call up the Custom Shell Scripts dialog box, below. it allows you to write “before” and “after” scripts that will run or call other scripts or Unix commands before and after Certbot is called to renew the Letsencrypt cert.
Be careful: these scripts are run as the superuser.
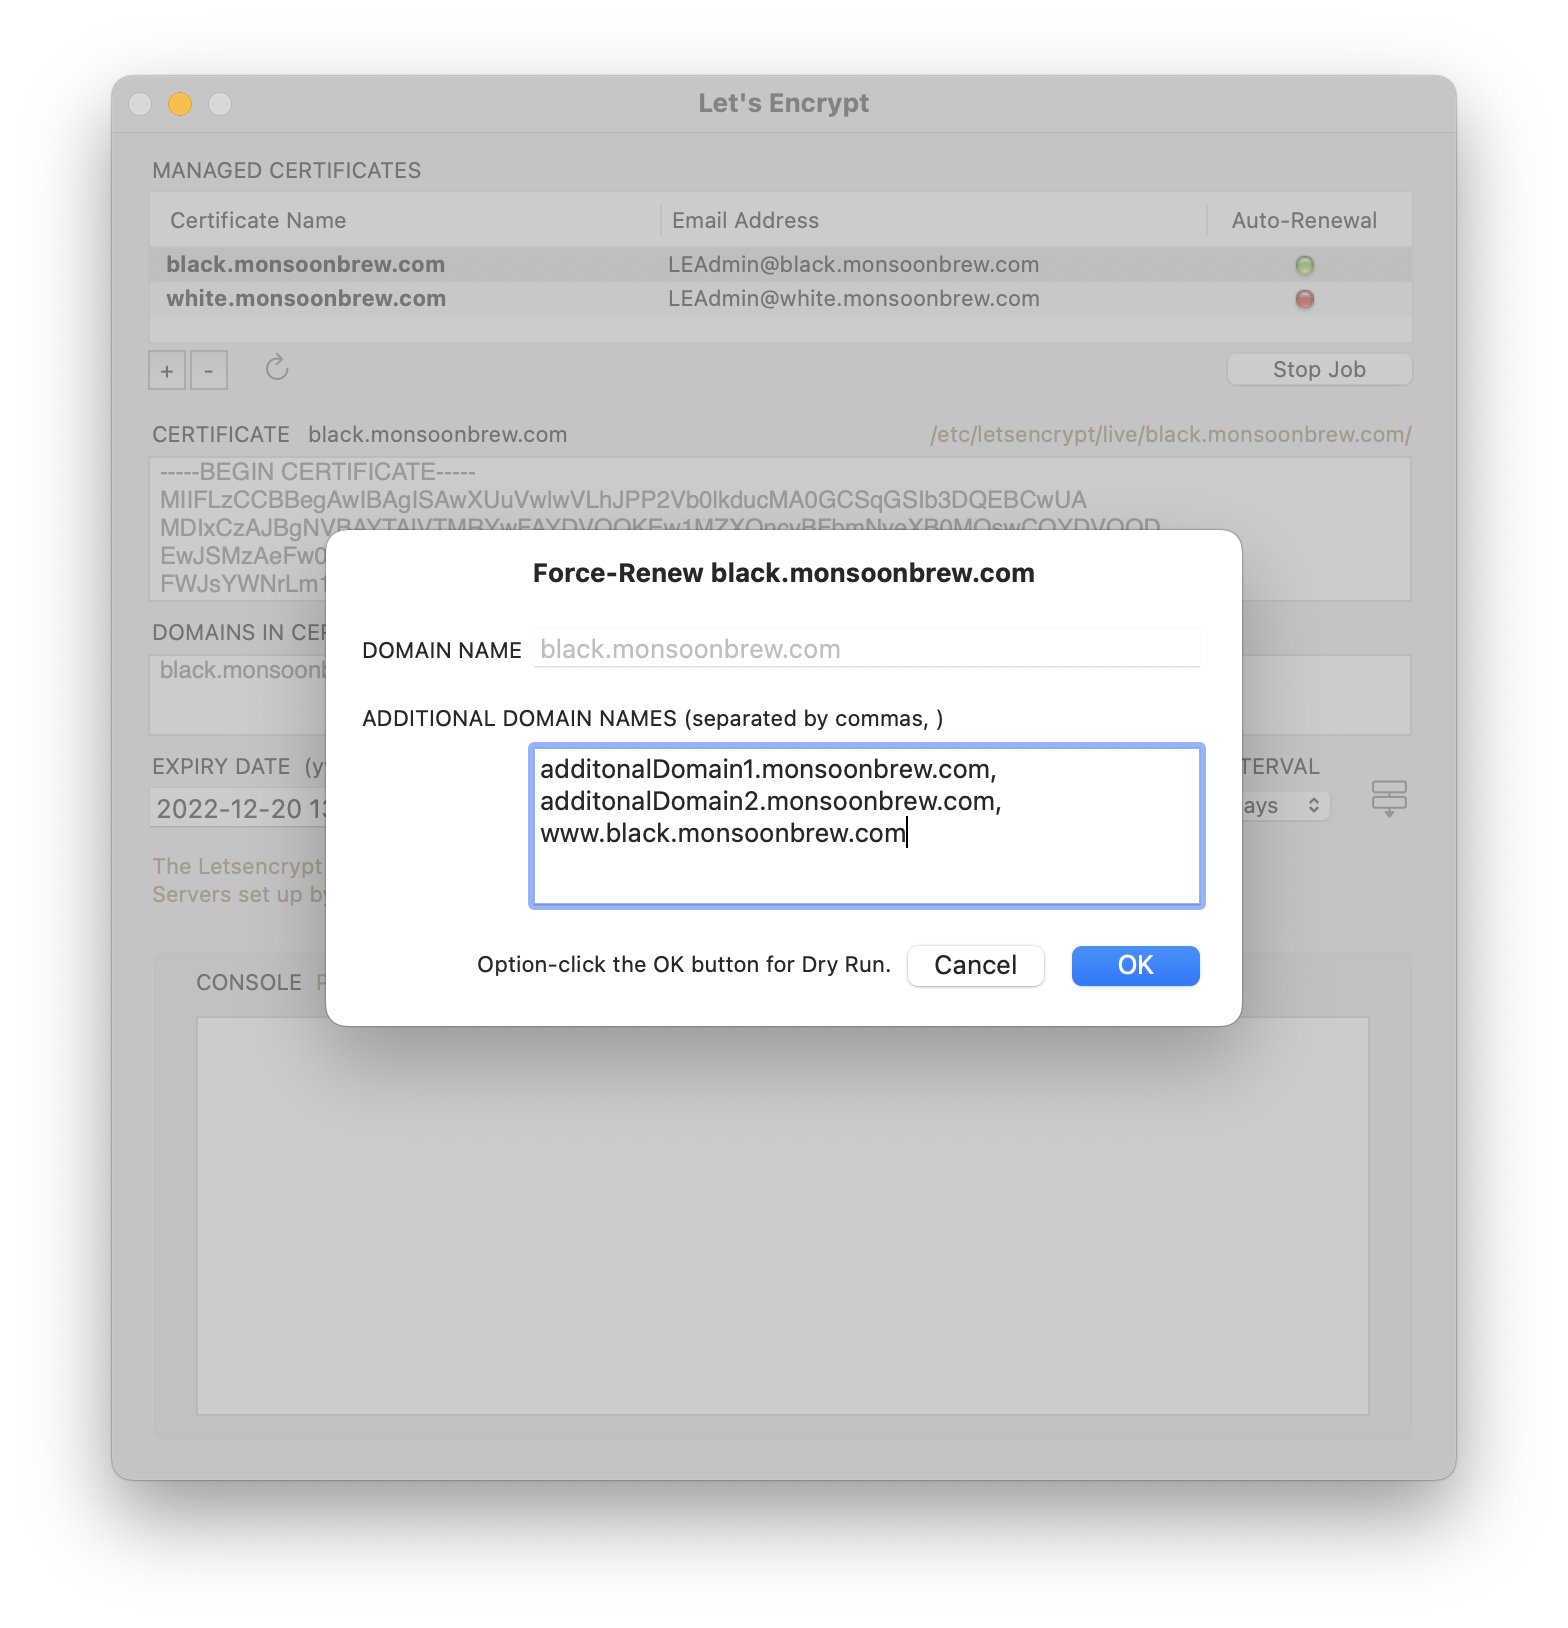
Updating the Letsencrypt Cert with a new set of domains
If you double-click on a cert record in the Managed Certificates table view, it will open up a dialog box where you can change the additional doman names included with this cert.
Enter these additonal domain names, separated by commas. Do not hit the Return button until you’ve entered them all because the Return button will click OK and start the update process.
Remember, you can use this cert wherever these domain names are used (with the proviso that ALL these domain names must point to the server you are running Letsencrypt Enabler on).
Option-click on the OK button to do a dry-run.
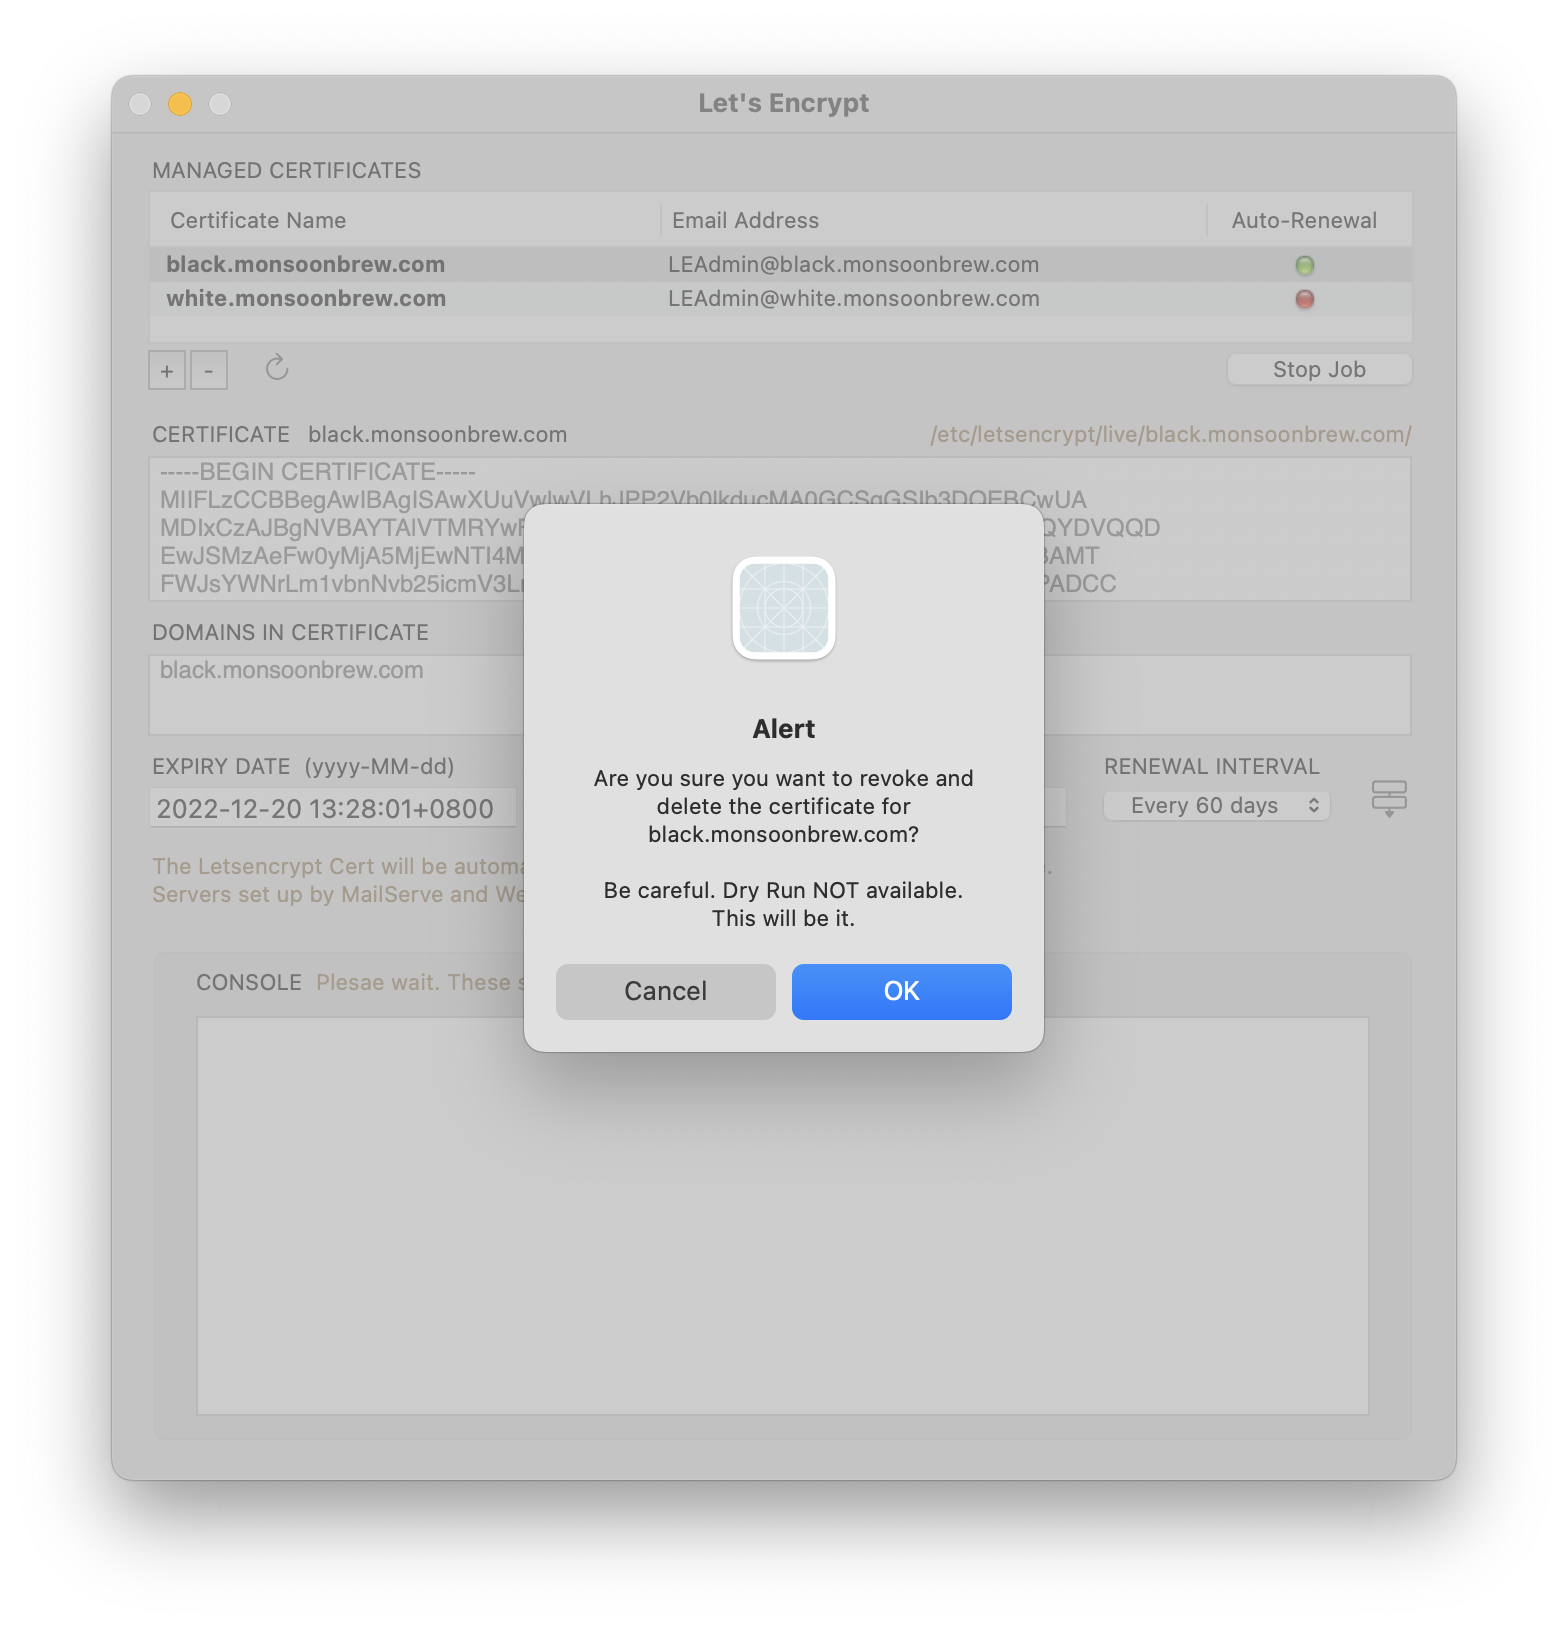
Revoking the Letsencrypt Cert
To Revoke a Cert, click the Revoke button (the - sign button under the Managed Certificates table view). Note the alert in the dialog box. There is no dry-run for this action. Clicking OK will completely delete this cert from your system (as well as Letsencrypt’s).
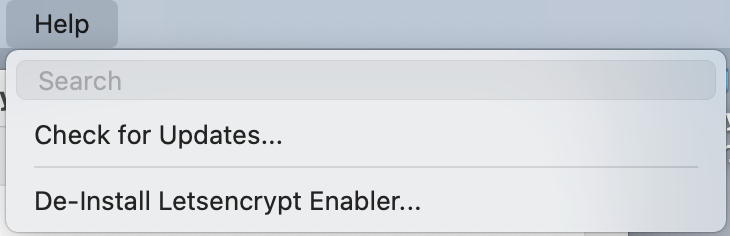
De-Installing Letsencrypt Enabler
You can un-install Letsencrypt Enabler by using the last menu item in the Help menu. It will shut down the Letsencrypt Enabler daemon, if it is running, and remove all files installed by Letsencrypt Enabler (in /opt/homebrew-cutedge), as well as the Renewal jobs. It will also revoke and remove all the certificates, if any, in /etc/letsencrypt/live.
Enjoy!
Release Log
4.0 September 25th 2022. Letsencrypt Enabler for Ventura released.
The latest version is 4.0
It will load either Intel and ARM binaries, depending on the processor it runs on.
Please check out the Release Log
Contact
Bernard Teo